Day  280 -Making Accordion Books


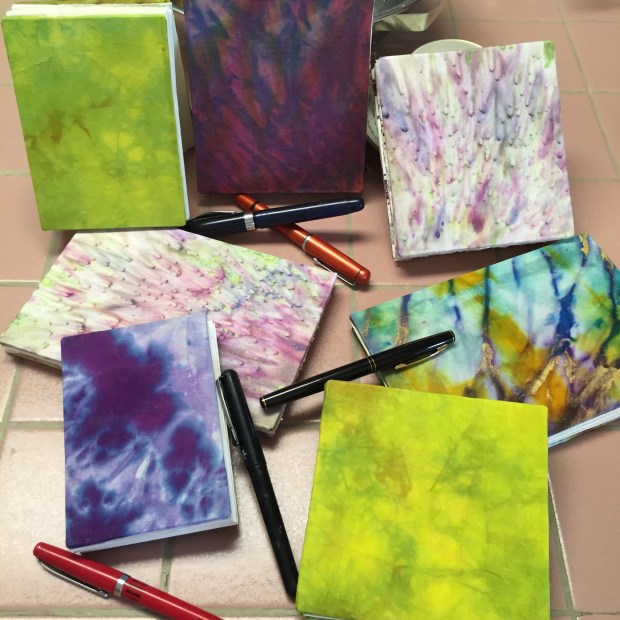
Why make them?? Because they are the easiest book to make because no sewing is involved. 

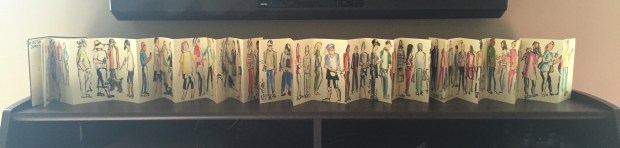
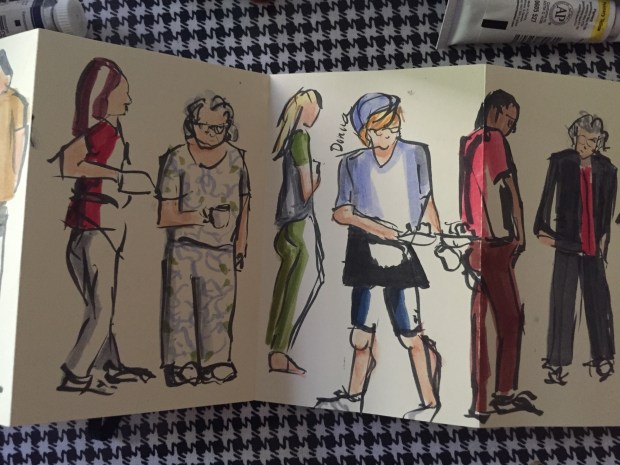
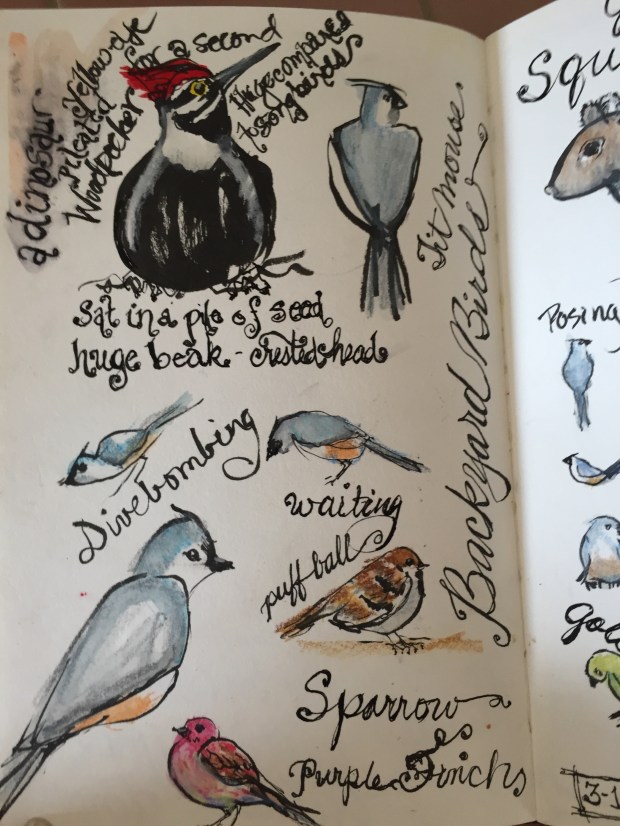
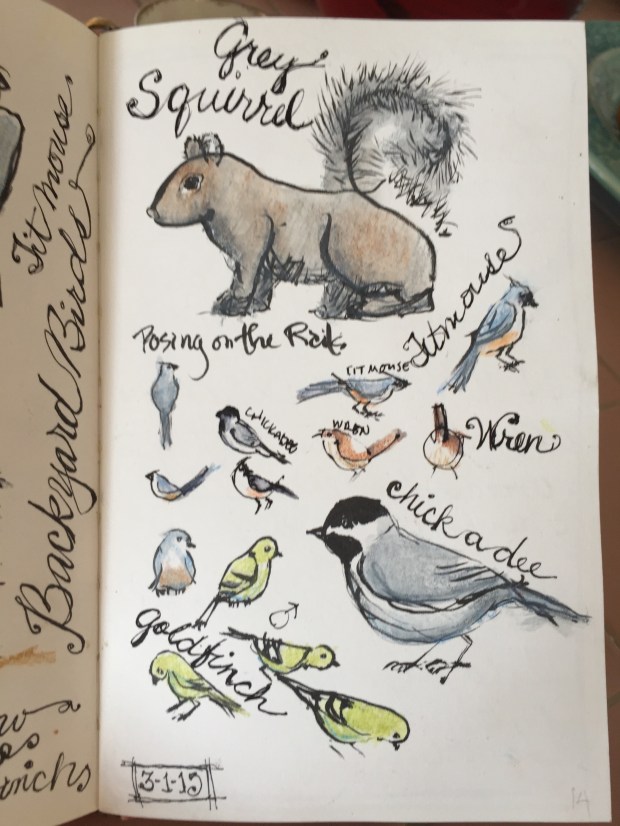
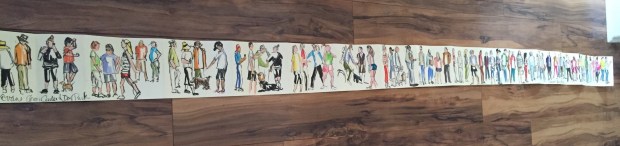
And because you can do this with them.  

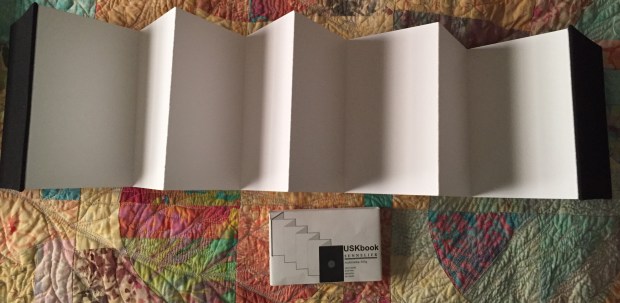
My Sennelier USKsketchbook.

 Nice heavy paper but only one length of paper.   Too short. Another reason to make one.  Dull black cover. 


 210″ small Moleskine accordion 

Or the famous moleskines. Again a dull black cover. Great length but the paper is terrible now that they are outsourced to China. Watercolor and pens will bleed they to the back so you can’t use it.   

So now that we know why we need to make one lets get started and gather our supplies. 

 Supplies

Book board or heavy cardboard

2-3 sheets of All purpose paper such as Stonehenge. 

PVA glue

Fabric for the covers – cotton muslin or sateen

Bone folder

Rulers

Pencil

Exacto knife or carton cutter

Optional

Self healing  mat

Parchment paper. Glue won’t stick to it. 

Let’s get started!

Sorry not to have better photos. I am out of town. No wifi no fabric or glue. I will update this when I return home hopefully next weekend showing how to cover the book board. 

Measure the width of the paper. 

Divide the width of the paper by 3 or 4. I made books ranging from 5″ – 7 1/2″ tall. I got three to four strips out of each piece of paper. 

Most books are 3 1/2″ x 5 1/2″ tall or 5″ x 7 1/2″ size. 


Folding the paper 

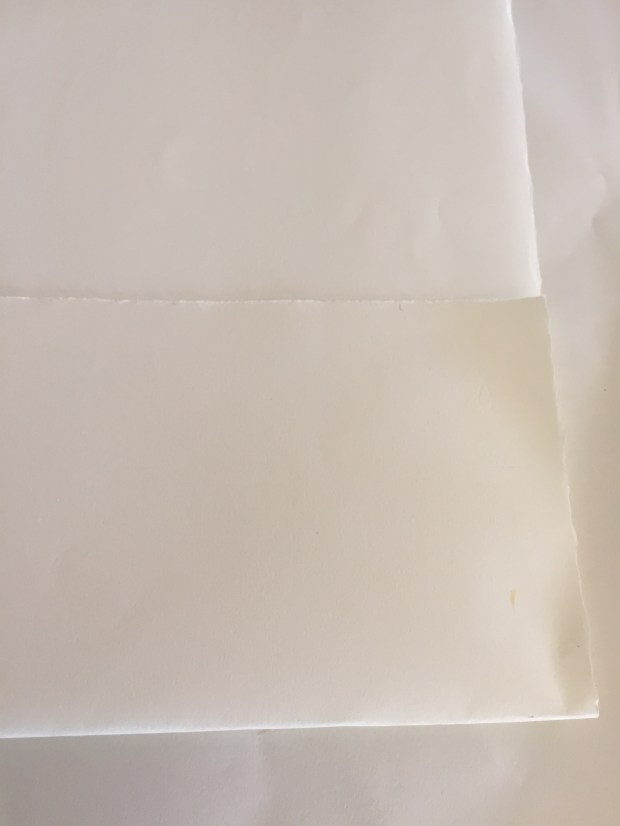
 Measure and mark your strips. It’s easiest to cut them with the Exacto  knife or a rotary cutter but I like the look of ripped paper edges.


Ripping the paper.  

 An easy way to get the torn edges is to fold your paper across the width and crease it with the bone folder. Then SLOWLY slide the bone folder along the crease ripping the paper. Roz Stendahl (Www.rozwoundup.typepad.com) has a you tube video on how to do this. http://youtu.be/pzlXHZ0f3kg Amazingly easy. 


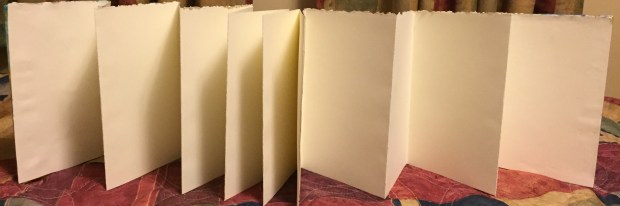
  The paper accordion folded. 

 Next fold your strips in half. Crease with the bone folder. Mark your fold lines either every 3 1/2″ or every 5″. Fold like a fan or accordion.

 Joining the pieces. There will be a tab of extra paper left on each end of your strips. Remove the tab from one end.  Cut the other tab down to a 1/2″. You will use this to glue the strips together. 

PUT THE GLUE ON THE BACK OF THE STRIP WITHOUT THE TAB AND GLUE THE TAB TO IT. AS IN THE PHOTO. 

BE SURE YOU GLUE ALL THE STRIPS TOGETHER ON THE SAME SIDE OR YOU WILL HAVE SOME TABS ON BOTH SIDES. YOU WANT THEM ALL ON ONE SIDE


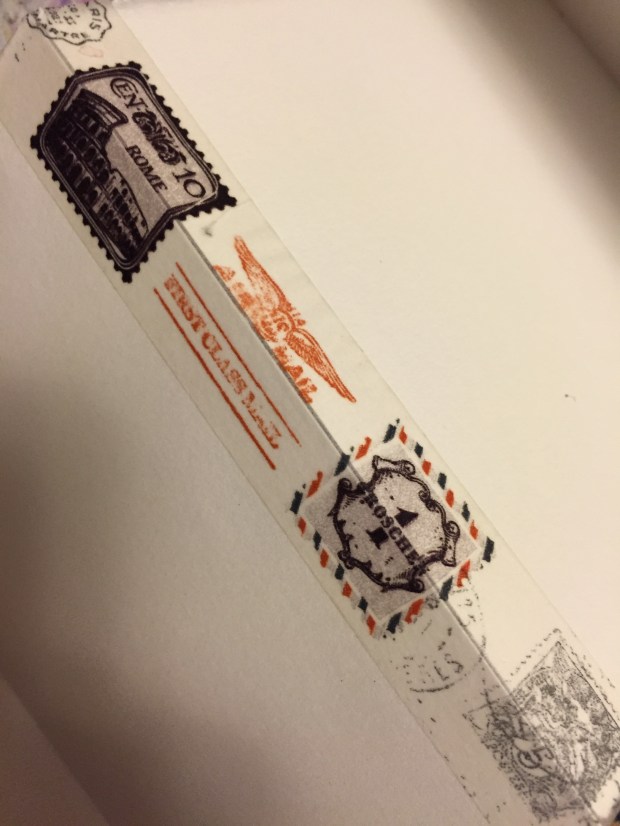
 If this frustrates you you can also use Washi tape to join your paper. 


 You can glue as many strips as you want together. The small  moleskines have 210″ of thin Chinese paper in them!! The larger moleskines have 124″ of thin Chinese paper. 

Just remember that heavier the paper is the fatter the book. 

Cut the cardboard covers 1/4″ bigger than your paper strips. Cut your fabric about 2″ bigger than your cardboard pieces. 

Spread glue on the board evenly.  Be sure to cover the whole board. and apply the fabric. Smooth the fabric with your bone folder removing any wrinkles and bubbles in the fabric. 


Mitering corners /Gluing sides. OPPS a wrinkle. 

 (This photo is from a tutorial I did on how to make a pamphlet stitch sketch book.http://scquiltaddict.blogspot.com/2014/10/day-96-sketchbook-part-2.html?m=1)

 Miter and glue the corners. Trim the fabric diagonally down before you fold and glue the corners. 

Neatly glue the sides down. 


 Glue the paper to the covers.  (I am not happy with the wrinkly paper. In later books I glued paper over the fabric covered board to make the end papers smoother. 

You are done. 👍 See not so hard. 

This webpage has great instructions with pictures. http://www.designsponge.com/2013/03/bookbinding-101-accordion-book.html

Thanks for looking!!

Day 275 – Rick Misbehaving

I started drawing Rick when my son and I were binge watching Walking Dead. 


It was the episode that they are arriving in Alexandria  and he was sitting still being interviewed. So I thought draw Rick!! 

OOPPPPSSS 

Of course as soon as I started to draw him he was done and the next interview began.  I kept trying to draw him. Oh what a mess he was. Just a little off here and there.  

This started out as an ink sketch. I didn’t like that at all so I added some caran d’ache like it was pastels. Scribbling it here and there. Adding odd ball colors like yellows,  red, light blue, and light purple. 

There are lots of things I liked about him and some not so much. I rewound and paused.  Slapped some flesh gouache to straighten out the hair line, erase bags, lengthen the cheek, sort the nose and hmm what else? Widen the brow, and get rid of a few stray ink marks. 

After the flesh colored gouache dried I added the same colors back again. Added some more black ink. I think I need to fix his neck. But otherwise he’s done. 

Thanks for looking. 

Day 273 -The last post of my Bayeux Tapestry

something new tomorrow. 


 I thought that my Bayeux Tapestry would fit in this tv cabinet which is huge. NOPE. The TV is a 50″ one. I mean the book is only 210 inches. Just shy of six feet. But I think it looks cool there anyway. 


Sennelier Urban Sketch Accordion with heavy paper. 

I found a temporary replacement at Binders. A nice heavy Sennelier accordion book but it’s only about a yard long. Not quite the impact of the long moleskine.  However that paper is much better.  Heavy nice paper. You could draw on both sides I think with no problem.

Bytw I also found out that Moleskine has outsourced all their books to China. The not so great paper is really terrible now. I won’t be buying more.  I am going to bind one. 

How hard can an accordion book be!?  I got some light weight BFK Rives paper, some Stonehenge and some of Binders brand like Stonehenge to give a whirl too. Exited but will have to wait till I get home because I don’t have all the tools here to do it with. Hence the purchase of the Sennelier book. 

In the meantime here is a closeup of all the panels. Promise last post of the moleskine. Done with Pentel brush pen, colored Pitt brush pens,  tombows, flesh watercolor and flesh gouache. 


Evans Towne Center walking track and dog park


   Evans Towne Center walking track and dog park


Evans Towne Center walking track and dog park


Evans Towne Center walking track and dog park


Evans Towne Center walking track and dog park and Inner Bean 


Inner Bean 


Inner Bean and Edgewood Target Atlanta


Edgewood Target Starbucks Atlanta


Edgewood Target Starbucks  Atlanta

Day 267 – Dr Sketchys – Part 2

All of these were drawn last week at Dr Sketchys. An about ten drawings that note. Dr Sketchys is always the Kay Wednesday of the month at 7 pm at Chat Noir at 8th and Ellis in downtown Augusta Ga. But it is a worldwide movement. You can find a group near you or start one!!!

All sketches are down with Pentel brush pen Pentel color brush pens and Tombow markers. 


 Cosmo detail posted earlier today on IG. A great model. Interesting poses. And he held them. This was a ten minute pose. 


Cosmo the whole guy!! His boots were too big and flipped on his feet which made them hard to draw. 


 Cosmo – oops he didn’t need his foot!! A lot of red lights on him. 


Cosmo is a fire water. This is actually two poses. He ate fire first. Then he loaded putting it out. 


And poor Cosmo was embarrassed by this pose. 


The last pose of the night. I think the elephant was funny. Others not so much. And that’s a wrap. Something new tomorrow. 

Thanks for looking.  

Day 259 – Life Model time 


WIP caran d’ache on kilimanjaro half sheet 

This Is the first standing pose I have ever drawn so I was thrilled to get her in proportion.  I have to give ilanya kudos for holding a rock steady pose for two hours. Not easy to do. 

Today I started drawing her with a light grey crayon. Next came flesh color.  That went well. 

Then I went for burnt sienna instead of yellow ochre and it was just too dark. When I added cobalt well. That was trouble.  I almost destroyed her with burnt sienna and cobalt blue.  Made an icky green. But when you think it’s ruined it can be a good thing. You don’t care what you do with it and experiment. 

I got out an ultramarine blue crayon burnt umber and the black. I never use the black. And I try not to use the dark colors on a young life model. Today I didn’t care. Anything was better than the ick blue and burnt sienna. 

I like the fake blues and Browns I used in her.  Anyway thanks for looking!!!

267 – Dog of the Day 

The Dog of the Day – my nieces lab Reagan with his birthday hat on. Happy Birthday Reagan!! Did I say a yellow lab is much harder to paint than a black one. Especially with a limited gouache palette.

 All you need for a black lab is a dark indigo blue for the  black with a touch of the English red and a lighter blue and a bit of red for the collar and you gue.


 The yellow lab? 😳 So many shades of cream, buff, peach, Browns, purples, greys and white. Red for the tongue and a bit of dark purple. 

And ps Azo yellow is NOT a good color for a yellow lab. It’s too lemony and turns him green when mixed with white and painted over the colors I was using. Any blue remotely near it turned it green. 😜 Not so with the Indian yellow which is very strange. 

I did use a lot of light purples for the greys. 

Background is watered down turquoise.  

Thanks for looking!  

Day 254 – Sunday!! 

Sundays I like to watch CBS Sunday Morning and Super Soul Sunday but not today. Zoe sat down next to me and she was watching to see what I was doing. And I thought “What a great painting she would make! so I took a photo of her.

 And then of course I drew her. If I had drawn her from life she would have gotten on the back of the sofa and turned her back to me before I was done drawing her. 


Zoe version 4. I realized she was way to fat In the last photo so I put her on an instant diet. I think she is done I hope she is done. She lost an inch in about a half an hour. Best diet ever. But who knows?!😃 in the morning she may need something else done. Stillman and birn zeta gouache Kuratake ink pen. #drawyourdog

She went they several stages. This is the finished one. Well you never know I may change her again. Zoe is done in schminke gouache and with my Kuretake brush pen in my Stillman & Burn Zeta. I had thought she was done twice before. 


This was the first time I thought she was done. Till I realized her back should be curved and NOT straight. OOPS!! I did like the odd wonkiness to her face. More on that in a minute. 


Here she is with her back curved the right way. I thought she was done for about a minute till I realized I needed to add some white to the Mohawk down her spine to make it look fluffier.  Back to the gouache. 


So here Zoe is with white hairs added to her Mohawk. Then I realized her nose was a twitch off as was her right eye. I got my #2 Isabey out. It’s a lovely  sable brush that will point like no other. I started adding bits of fine hair here and there on her face with white and caramel colors on her darker bits. I used indigo around her nose mixed with a bit of Sienna for blacks and greys. I also added some whiskers. 

Thanks for looking!!!

Day 246 Life Drawing

IMG_8866

Today we drew the lovely Amy.  I was using Caran d’arch on 140# Kilimanjaro.  Today was her fortieth birthday So HAPPY Birthday Amy.  

I started by drawing her first in with a yellow ochre caran d’ache crayon. I had actually brought my watercolor pencils to give them a go starting the picture but instead I grabbed the crayon and off I went.

After I blocked in her head and measured her shoulders I just started adding colors.  Most of her face was in heavy shadow.I probably should lighten the shadow under her nose and chin…looks like a goatee lol…BUT OH well..its a sketch and its DONE!  I should have followed Charles Reid Iconic Rule NEVER use anything darker than burnt sienna on a younger face…I used Burnt Umber…DUH!!

It would be easy enough to fix.  Just wet it down and wipe it off with a piece of bounty paper towel and recolor it with burnt sienna.  MAYBE tomorrow or MAYBE NOT!! Thinking NOT!!

She has beautiful red hair. A darkish auburn.  I didnt have anything remotely resembling her hair color so I added some dark pink to the burnt sienna…even if it wasnt the right color it was fun!!  A girl needs her pink!

IMG_8841
This is Amy after the first half an hour of drawing.  Notice NO burnt umber under her lip.

amy1

SO I guilted myself into getting up and lightening up the shadow on her face.  I do have to say that its MUCH easier to lift color off the Fabriano coldpress than off the Kilimanjaro.  I scurbbed it a little with my hogbristle brush and then added some flesh color to lighten it up. The caran d’ache are really like a cross between pastels and watercolor.They tend to be a little more opaque than the watercolors I usually use which can be a good thing or a bad thing depending on what you are doing.  I also added more highlights to her face. Now I really am calling her done.

IMG_8867

I finished Amy about half way thru the second half hour session so I turned the board over and started playing with color on the other side. I sprayed it alot with water and had fun letting her drip.  Added pinks to the ultramarine blues I was using.  

amybelly

This is my favorite part of this sketch…arent the colors just gorgeous?? This is her tummy and her belly button in case you didnt know!!

The model Amy actually bought this one from me…THANKS AMY!!!

ANYWAY, Caran d’ache are ALOT of fun…go get a small box and have fun drawing.  They keep you from getting too tight.  Add in a spray bottle and it will produce some of the most delicious drips you have ever seen.

Thanks for looking!

Day 243 – The Chicken or All Roz’s Fault!!


This was the first chicken that posed for me when we went to Key West. I bought a box of Schminke gouache from Wet Paint last week and Roz said use them for two weeks. Painted on Strathmore 500 Mixed Media Paper. 

Till I did the chicken all I had done was paint backgrounds to cover up boo boos like yesterday. I meant to paint my house or a church downtown that I have always loved as the last assignment for the last teacher in the last week of Sketchbookskool

I ran across this chicken pic. He cocked his head at me and said paint me. I succumbed. What can I say?! Maybe that’s why I have been doing all the bird drawings. Practicing for this rooster. 

First I drew him quickly on a scrap of paper laying on the table. 


That did it. He hooked me. I got the sketchbook out. 


And the lovely new box of Schminke gouache.


 It came in this great wooden box. Almost too pretty to be touched!  But I managed. 

I used all the colors and tubes of  M.Graham Azo yellow and pyrole red that I already had. It was much like painting with acrylics without the shiny plastic look they have.  The colors covered well. Easy to mix. I did have to get out my acrylic brushes. The long watercolor brights were not stuff enough. 

Tip: I used my monarch Winsor & Newton filberts and an escoda Prado filbert. After I switched to these the paint behaved so well. Went on easily and smoothly. Yesterday I discovered the stiffer hog bristle brushes leave ridges in the paint. Not a good look. 

Thanks for looking. 

Day 242 – A Trial

I make some spectacular screw ups to fix. I was trying to capture the birds doing something besides a profile view. Upside down, looking over their shoulder, diving in,etc. For some reason while I was drawing this I decided to use a pilot varsity to do the lettering like I don’t have five other pens loaded with permanent inks in three colors. DUH what was I thinking?!

Fast forward to I thought watercolor wash for the background. White is so boring. It needed a little umph, don’t you think?!

The pilot began to run. See the top left corner?! Nasty. Had such nice writing. All done with that Pilot. I liked this spread and I wanted to save it. What to do?!

The Pilots come in seven great colors.  NONE of them permanent. BEWARE if you want to watercolor over them. And yes I have all seven of them. 


So what all did I try to fix the mess?! Read on!!

Got the bright idea to wet the pilot own words down and wipe some of the ink off. Maybe that would help when I painted over it?! Nope!!! 

Then I painted over it with white gouache after all Roz said it would cover anything. Make that anything besides a non permanent pilot pen. More Grey. Sigh. 

Next I got out some acrylic paint. Since its plastic I didn’t think the ink could bleed thru. I was right EXCEPT the paint was semitransparent. You could still see the lettering and the grey gouache mess. 

OnWaRd!! At this point I thought why not paint over it with gouache. I was right the ink would not leak they the yellow green acrylic paint aka plastic layer. But since I didn’t feel the greatest I couldn’t find a tube of bright clear yellow to mix with the turquoise for a great yellow green. BUT even though I knew it would make a muddy green – think pea colored-I persisted and lo and behold a massive pile of pea green. I used it.  Didn’t want to waste it. Did NOT like that layer. A sock pea color. 

I finally found a tube of Azo yellow gouache I had accidently bought at Sam Flaxs. A deep turquoise will over power a light yellow. I knew that. Did I hold back on the blue?! NOPE. Most of a tube of yellow later I finally got a light enough color. And painted it for the third time if you count the coat of white gouache. 

Success finally. How many hours and a whole tube of paint. Here’s how it looks now. 


TIP: Gotta make it worth your reading. 

I had tried my Noodler Creaper Ahab on gouache yesterday. It really HATED the gouache. 

No problem. I have a lot of felt tip pens. Pitt pens Staedler pens Micron and Kuratake pens including a nylon brush Kuratake pen similar to the Pentel Brush pen. 

I didn’t try the Staedler or the Micron after the gouache gummed up my Pitt pens. The Kuratake brush pen was super with the gouache. 

The fiber tip Kuratakes not so much. Started clogging up. I may have a lot of pens but I treasure them all and DONT want to ruin their tips. 

Bytw you can buy a Kuratake on amazon. Very Japanese looking pen. Even has a loop on it. 

Thanks for looking.